Hi! Hope you're enjoying this blog. I have a new home at www.goldsborough.me. Be sure to also check by there for new posts <3

Thursday, April 2, 2015

Python's built-in range() function in C++

Not that I don't appreciate the differences between Python and C++, but ...

class range
{
    
public:
    
    typedef std::vector<long>::iterator iterator;
    
    typedef std::vector<long>::const_iterator const_iterator;
    
    range(long end)
    : range(0, end)
    { }
    
    range(long begin, long end, long step = 1)
    {
        long diff = end - begin;
        
        if ((diff > 0 && step > 0) ||
            (diff < 0 && step < 0))
        {
            while(begin != end)
            {
                range_.push_back(begin);
                
                begin += step;
            }
        }
    }
    
    iterator begin()
    {
        return range_.begin();
    }
    
    const_iterator begin() const
    {
        return range_.begin();
    }
    
    iterator end()
    {
        return range_.end();
    }
    
    const_iterator end() const
    {
        return range_.end();
    }
    
private:
    
    std::vector<long> range_;
};

int main(int argc, char * argv [])
{
    for (auto i : range(10, 5, -1))
    {
        std::cout << i << std::endl;
    }
}


Output:

10
9
8
7
6

Maybe not that much shorter, but certainly nicer than your usual way of iterating over a range:

for (std::size_t i = 10; i > 5; --i)
{
    std::cout << i << std::endl;
}

kthxbye

Wednesday, April 1, 2015

Python's built-in zip() function in C++

We all know, use and love Python's built-in zip() function.

In Python, the implementation of the zip() function probably looks like, or at least could be replicated by this cute little lambda:

zip = lambda *args: [[i[n] for i in args] for n in range(len(min(args,key=len)))]

Python, being a weakly typed programming language with support for list comprehensions as well as elements of functional programming such as the lambda function feature shown here, makes it easy to create these super concise, variable length, who-cares-about-types-anyway functions.

Now, if we leave type utopia and enter the world of strongly typed programming languages such as C++, things look a little different. Types suddenly matter and variable length parameter lists take a little more thought to implement than simply adding an asterisk (note to self: great success, no longer spelt it asterix). As a matter of fact, parameter packs and variadic template functions, the combination of features we'll use in this tutorial, were only added in C++11, but provide some much-needed and really, really cool functionality.

At the end of this tutorial, this C++ code will work:

int main(int argc, char * argv [])
{
    std::vector<int> a = {1,2,3};
    std::vector<int> b = {4,5,12,44};
    std::vector<int> c = {6,7,8,9};
    
    for (auto i : zip(a, b, c))
    {
        for (auto j : i)
        {
            std::cout << j << "\t";
        }
        
        std::cout << std::endl;
    }
}

Pretty concise, no?

Before I show you and describe the code that makes the above behavior possible, let me write a few words about variadic template functions in C++. Basically, they enable us to have template functions that take a variable number of parameters. Example:

void foo()
{ }

template<typename T, typename... Args>
void foo(const T& head, const Args&... tail)
{
    std::cout << head << std::endl;
    
    foo(tail...);
}

Variadic template functions are created by having a parameter pack argument for a template function or class. This parameter pack type is denoted by the "typename" keyword followed by an ellipsis ("...") and a name, in the function above "Args" (seems to be the conventional name for C++ parameter packs). When a function then takes such a parameter pack as an argument, as does foo() above, you can call the function with a variable number of arguments, e.g. foo(1, 2, 3, 4) or foo("lorem", "ipsum").

The problem is that you cannot actually retrieve any values from this parameter pack, you can only expand it, i.e. you can't do args[2] to get the third element of a parameter pack "args", you can only do args... (note the ellipsis) which will yield the full list of parameters passed to it.

To tackle this problem, we have two template types: T and Args. Args is the template parameter pack I already introduced you to. By having a second template type T as the first argument, we can capture the first item passed the function, which will enable us to do things with it! We can then recursively call this variadic template function each time making one item from the parameter pack the "head" (type T) which we can use, while packing all other arguments into the parameter pack, the "tail" (of type Args...), which we pass on to the next stack. When the tail is empty at the very end, the overload of the function taking no parameters is called.

So, what happens when we call foo(1,2,3)? The "head" of type T will be 1 at first, while 2 and 3 are stored in the parameter pack Args. Then we call foo(tail...), thereby expanding the parameter pack. This is equivalent to foo(2,3). In the next function stack, head is equal to 2 and 3 is stored in the tail. The parameter pack expansion is then equivalent to foo(3), thus setting head equal to 3 in this stack while the parameter pack is empty. When we call foo(tail...) one last time, it will be equivalent to foo(). This is why we need a parameter-less overload of foo(), even though we don't have to do anything in it. It will just start the movement back down the stacks.

The output would therefore be:

>> foo(1,2,3);
>> 1
>> 2
>> 3

Now that the behavior of C++ variadic template functions should be clear(er), I can show you the code for the zip() function in C++ (also found here as a gist):

template<typename T>
class Zip
{
    
public:
    
    typedef std::vector<T> container_t;
    
    template<typename... Args>
    Zip(const T& head, const Args&... args)
    : items_(head.size()),
      min_(head.size())
    {
        zip_(head, args...);
    }
    
    inline operator container_t() const
    {
        return items_;
    }
    
    inline container_t operator()() const
    {
        return items_;
    }
    
private:
    
    template<typename... Args>
    void zip_(const T& head, const Args&... tail)
    {
        // If the current item's size is less than
        // the one stored in min_, reset the min_
        // variable to the item's size
        if (head.size() < min_) min_ = head.size();
        
        for (std::size_t i = 0; i < min_; ++i)
        {
            // Use begin iterator and advance it instead
            // of using the subscript operator adds support
            // for lists. std::advance has constant complexity
            // for STL containers whose iterators are
            // RandomAccessIterators (e.g. vector or deque)
            typename T::const_iterator itr = head.begin();
            
            std::advance(itr, i);
            
            items_[i].push_back(*itr);
        }
        
        // Recursive call to zip_(T, Args...)
        // while the expansion of tail... is not empty
        // else calls the overload with no parameters
        return zip_(tail...);
    }
 
    inline void zip_()
    {
        // If min_ has shrunk since the
        // constructor call
        items_.resize(min_);
    }
 
    /*! Holds the items for iterating. */
    container_t items_;
    
    /*! The minimum number of values held by all items */
    std::size_t min_;
    
};
 
template<typename T, typename... Args>
typename Zip<T>::container_t zip(const T& head, const Args&... tail)
{
    return Zip<T>(head, tail...);
}

As you can see, the zip() function is a variadic template function, but it is only an extra level of indirection to a template class, Zip<T>, whose constructor is again a variadic template function. The code is commented, but I will explain the general procedure of a call to zip().

Just to re-cap: the aim of the zip function and the Zip class is to restructure a variable number of containers into a new set of containers, where each container in the new set holds all items for a single column of the old set. Because we want each container of the new set to have the same length, we must use the minimum number of columns in the old set for our restructuring process. This sounds kind of complicated, but we're essentially just transposing the old set of containers (switching rows for columns).

We can't completely escape strong typing, even with the use of templates, because we have to store the values from the old set of containers into some other set while restructuring. Therefore, Zip<T> is a template class where T is the type of container we're passing, e.g. std::vector<int> in the main loop at the top of this post. When we call zip with a set of vectors of ints, the private variable "items_" will be of type std::vector<std::vector<int>> (typedef container_t). items_ is the object we return from zip(), by the way, so the return type of zip() is Zip<T>::container_t.

So a function call to zip(T, Args) will be forwarded to Zip<T>(T, Args), which again forwards to its own variadic template function that does the actual work of unpacking and restructuring the containers: zip_(T, Args), which has the overload for when Args is empty: zip_().

So how do we make the restructured containers / items retrievable? I decided that the best and most intuitive way would be to overload the implicit conversion operator to container_t, as well as overload the function call operator of the Zip<T> class. The overload of the conversion operator is useful any time we want to directly convert the Zip object to the container_t, e.g. as we do in the zip() function (the implicit conversion happens when we return the object). However, I figured that one case in which this would not work is if passing the Zip object as a template parameter to a function that expects the zipped container and not the Zip class, as there would be no implicit conversion in that case. To solve this problem, we have the possibility of explicitly retrieving items_ through the function call operator:

template<typename T>
void foo(const T& t)
{
    std::cout << t.size() << std::endl;
}

Zip<std::list<int>> zipObject(a,b,c);

foo(zipObject); // Error, Zip has no member size()
    
foo(zipObject()); // All okay, Zip::container_t has member size()

Given that the Zip object is supposed to simulate function behavior as well as possible, I chose the function call operator overload over having an explicit get() member or anything, thus making Zip into a true functor object. Of course, ideally, we shouldn't be handling the Zip object ourselves, but just be calling the zip() function which returns Zip::container_t in a much more intuitive way.

So after all this explaining business, what actually is the output of the zip() function. Does it even work?

int main(int argc, char * argv [])
{
    std::vector<int> a = {1,2,3};
    std::vector<int> b = {4,5,12,44};
    std::vector<int> c = {6,7,8,9};
    
    for (auto i : zip(a, b, c))
    {
        for (auto j : i)
        {
            std::cout << j << "\t";
        }
        
        std::cout << std::endl;
    }
}

Output:

>>> 1    4    6 
>>> 2    5    7 
>>> 3    12   8

Yey! Thanks for reading! :)

Monday, March 9, 2015

Customizing QDials in Qt - Part 2

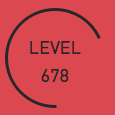
Welcome back to my tutorial on customizing QDials in Qt! In the first part of this tutorial I pointed out that while Qt gives us the possibility to style labels, buttons and many other widgets, there is no out-of-the-box way to customize QDials. I then explained that if we really do want to add some styling to a QDial, we have to subclass it and do a complete re-paint of the object. At the end of part one, you had this super awesome fully CSS-stylable dial:


That's a dial. We know that. Why? Because all dials look like that -- we've seen it 12000 times and now + 1. Let's innovate! Let's make this dial:


In this case, we're not sliding a small circle around the edge of a bigger one, we're actually drawing an arc with a length of between 0 and 360 degrees. Moreover, because the arc takes up relatively little space on the dial, I've added support for showing a title string as well as the dial value in the center of  our widget. Don't worry if you don't like the dial's background color, font color, arc color or the width of the arc, you'll have full support for customizing those options to your liking using stylesheets!

So, I guess I'll just throw the declaration of our QDial subclass -- CustomDial -- at you:

#ifndef CUSTOMDIAL_HPP
#define CUSTOMDIAL_HPP

#include <QDial>
#include <QString>
#include <QSharedPointer>

class QColor;
class QRectF;
class QPen;

class CustomDial : public QDial
{
    Q_OBJECT
    
    Q_PROPERTY(QString arcColor READ getArcColor WRITE setArcColor)
    
    Q_PROPERTY(double arcWidth READ getArcWidth WRITE setArcWidth)
    
public:
    
    explicit CustomDial(QWidget* parent = nullptr);
    
    CustomDial(const QString& text,
               QWidget * parent = nullptr,
               int minimum = 0,
               int maximum = 999);
    
    
    void setArcColor(const QString& color);
    
    QString getArcColor() const;
    
    
    void setStartAngle(double angle);
    
    double getStartAngle() const;
    
    
    void setMaximumAngle(double angle);
    
    double getMaximumAngle() const;
    
    
    void setArcWidth(double px);
    
    double getArcWidth() const;
    
    
    void setText(const QString& text);
    
    QString getText() const;
    
    
private slots:
    
    void updateValue();
    
private:
    
    virtual void paintEvent(QPaintEvent*) override;
    
    virtual void resizeEvent(QResizeEvent* event) override;
    
    double maximumAngleSpan_;
    
    double startAngle_;
    
    double arcWidth_;
    
    double angleSpan_;
    
    QString valueString_;
    
    QString text_;
    
    QSharedPointer arcRect_;
    
    QSharedPointer valueRect_;
    
    QSharedPointer textRect_;
    
    QSharedPointer arcColor_;
    
    QSharedPointer arcPen_;
};

#endif // CUSTOMDIAL_HPP

I'll talk about a few important aspects of this class. As in the last example, we subclass our CustomDial class from the QDial class, given that we want to retain its behavior -- the way you can slide it in a circular motion to change its value -- as well as its interface -- e.g. setRange(), setValue() or any size-related method.

By declaring a Q_PROPERTY for the color and width of the dial's arc, we will later be able to modify and customize those values from a stylesheet. Just to re-cap: the Q_PROPERTY macro takes a data type as its first argument, e.g. a QString for the color (an overload of QColor's constructor takes an RGB hex triplet as string), then a name for the property -- in our case arcColor and arcWidth, respectively -- followed by READ and WRITE member functions to retrieve the value and write to it in case it is changed in a stylesheet. Note that the two other properties we want to be able to customize -- the dial's background and font color -- already have property definitions built-in: you can  access them via the "background" and "color" properties in CSS.

The public methods of our CustomDial class are just interface -- getters and setters. Our private slot updateValue() we'll later on connect to the QDial::valueChanged signal so that we can update our internal variables, i.e. the span of the arc as well as the value string we display in the center of our dial. Note that we could technically calculate the arc span and other variables dependent on the dial's value in the paintEvent() method itself, however to keep things nice and optimized we take those invariants out, thus ensuring that we perform no unnecessary calculations should the dial value between two separate calls to paintEvent() not change.

I'll also quickly talk about the class' private members. paintEvent() is our familiar friend, who paints the widget onto our application's window. resizeEvent() is another inherited method from QDial, that is called automatically whenever the dial is forced to resize. Because we keep the painting areas / rectangles for our dial arc, dial title as well as the dial value string stored for optimization purposes, we'll have to resize those rectangles whenever the widget has to resize. That's what we do in resizeEvent().

startAngle is the angle at which the arc of our dial starts (270° in the dial shown above) and maximumAngleSpan is the maximum span the arc can have (-360° above). As such, the arc's angle span for any given dial value will be between startAngle (minimum dial value) and startAngle + maximumAngleSpan (maximum dial value). The other variables should be self-explanatory or will become so when I talk about them further.

Here is the definition of the CustomDial class:

#include "CustomDial.hpp"

#include <QPainter>
#include <QColor>
#include <QLabel>
#include <QRectf>
#include <QPen>
#include <QResizeEvent>

CustomDial::CustomDial(QWidget* parent)
: QDial(parent)
{ }

CustomDial::CustomDial(const QString& text,
                       QWidget* parent,
                       int minimum,
                       int maximum)
: QDial(parent),
  text_(text),
  arcRect_(new QRectF),
  valueRect_(new QRectF),
  textRect_(new QRectF),
  arcColor_(new QColor),
  arcPen_(new QPen)
{
    QDial::setRange(minimum, maximum);
    
    QDial::setCursor(Qt::PointingHandCursor);
    
    connect(this, &QDial::valueChanged,
            this, &CustomDial::updateValue);
    
    setMinimumSize(100,100);
    
    setMaximumAngle(-360);
    
    setStartAngle(270);
    
    updateValue();
}

CustomDial::~CustomDial() = default;

void CustomDial::paintEvent(QPaintEvent*)
{
    QPainter painter(this);
    
    // So that we can use the background color
    // Otherwise the background is transparent
    painter.setBackgroundMode(Qt::OpaqueMode);
    
    // Smooth out the circle
    painter.setRenderHint(QPainter::Antialiasing);
    
    // Use background color
    painter.setBrush(painter.background());
    
    // Get current pen before resetting so we have
    // access to the color() method which returns the
    // color from the stylesheet
    QPen textPen = painter.pen();
    
    // No border
    painter.setPen(QPen(Qt::NoPen));
    
    // Draw background circle
    painter.drawEllipse(QDial::rect());
    
    painter.setPen(textPen);
    
    painter.drawText(*textRect_, Qt::AlignHCenter | Qt::AlignBottom, text_);
    
    painter.drawText(*valueRect_, Qt::AlignCenter, valueString_);
    
    painter.setPen(*arcPen_);
    
    painter.drawArc(*arcRect_, startAngle_, angleSpan_);
    
}

void CustomDial::resizeEvent(QResizeEvent* event)
{
    QDial::setMinimumSize(event->size());
    
    double width = QDial::width() - (2 * arcWidth_);
    
    double height = width / 2;
    
    *textRect_ = QRectF(arcWidth_, arcWidth_, width, height);
    
    *valueRect_ = QRectF(arcWidth_, height, width, height);
    
    *arcRect_ = QRectF(arcWidth_ / 2,
                       arcWidth_ / 2,
                       QDial::width() - arcWidth_,
                       QDial::height() - arcWidth_);
}

void CustomDial::updateValue()
{
    double value = QDial::value();
    
    // Get ratio between current value and maximum to calculate angle
    double ratio = value / QDial::maximum();
    
    angleSpan_ = maximumAngleSpan_ * ratio;
    
    valueString_ = QString::number(value);
}

void CustomDial::setArcWidth(double px)
{
    arcWidth_ = px;
    
    *arcRect_ = QRectF(arcWidth_ / 2,
                       arcWidth_ / 2,
                       QDial::width() - arcWidth_,
                       QDial::height() - arcWidth_);
    
    arcPen_->setWidth(arcWidth_);
}

void CustomDial::setText(const QString& text)
{
    text_ = text;
}

QString CustomDial::getText() const
{
    return text_;
}

double CustomDial::getArcWidth() const
{
    return arcWidth_;
}

void CustomDial::setMaximumAngle(double angle)
{
    maximumAngleSpan_ = angle * 16;
}

double CustomDial::getMaximumAngle() const
{
    return maximumAngleSpan_ / 16;
}

void CustomDial::setStartAngle(double angle)
{
    startAngle_ = angle * 16;
}

double CustomDial::getStartAngle() const
{
    return startAngle_ / 16;
}

void CustomDial::setArcColor(const QString& color)
{
    arcColor_->setNamedColor(color);
    
    arcPen_->setColor(*arcColor_);
}

QString CustomDial::getArcColor() const
{
    return arcColor_->name();
}

A lot of this is just interface. A lot of it is not. But before I talk about anything that doesn't concern the getters and setters you see here, I just want to tell you why you see the number 16 floating around here. The reason why we have to multiply all angles we use by 16, such as the arc's start angle or angle span, is that we later on have to call QPainter::drawArc(), whose documentation reads:

void QPainter::drawArc ( const QRectF & rectangle, int startAngle, int spanAngle ) 

Draws the arc defined by the given rectangle, startAngle and spanAngle. 

The startAngle and spanAngle must be specified in 1/16th of a degree, i.e. a full circle equals 5760 (16 * 360). Positive values for the angles mean counter-clockwise while negative values mean the clockwise direction. Zero degrees is at the 3 o'clock position.

That should explain it. I'll talk about a few other non-self-explanatory methods.

In CustomDial::setColor(), we update the color of the arc by calling QColor::setNamedColor() on our internal arcColor_ variable and passing it the RGB hex triplet we get as a QString (e.g. #FFFFFF). We also set this color directly to our private arcPen_ variable which we'll later use to draw the arc in CustomDial::paintEvent().

CustomDial::setArcWidth() is the function responsible for, as the name implies, updating the width of the arc. When the width of the arc changes, we also have to update the rectangle in which we draw the arc later on in paintEvent(). The arc's dimensions are chosen in such a way that the arc sits right on the edge of the dial. Because the arc is essentially a line with a border of arcWidth_ / 2 to its left and right, we offset the position of the arc by arcWidth_ / 2 so that it fits onto the screen perfectly.

CustomDial::updateValue() is the private slot we connected to QDial::valueChanged so we can monitor the value of the dial and update our internal variables. In it, we calculate the ratio between the dial's current value and the maximum value (e.g. 50 / 100 = 0.5) and then calculate the current angleSpan of the arc as that ratio multiplied by the maximum angle span (e.g. 0.5 * -360° = -180°).
We also store the dial value as a string so we can display it later on.

CustomDial::resizeEvent() is the method we inherited from QDial, that is called whenever the widget is forced to resize. In it, we resize and update all our internally stored QRects (for the arc, for the dial value and the dial label / title / text). I should mention that the dial text / label occupies the top half of the dial and the dial value string the bottom half.

Lastly, the most important method: CustomDial::paintEvent(). It does the actual work -- the actual painting of our widget. I added some comments to the first part, the rest should be quite easy to understand. Basically, we first make the background color ("background" property in CSS) retrievable by setting the background mode to Qt::OpaqueMode, then set the QPainter object's current brush to that used for the background (which includes the background color). After ensuring that we get nicely drawn, anti-aliased circles via QPainter::setRenderHint(QPainter::Antialiasing), we store the current pen (which holds the color from the "color" CSS property), then set the pen to a borderless one and finally draw our background circle. We then reset the current pen to the stored one and so that we can draw the dial label and dial value string with the appropriate color. Lastly, we use the stored arcPen_ to draw the arc around the dial. You already saw the definition of QPainter::drawArc() above.

And that should make your CustomDial work! Of course, as promised, you can customize the dial using stylesheets. This is the CSS for the dial I showed at the top of this post:

CustomDial {
  background-color: transparent;
  font-size: 18px;
  font-family: DIN;
  color: #27272B;
  qproperty-arcColor: #27272B;
  qproperty-arcWidth: 3; }

Thanks for reading! I hope this helped! :)

Sunday, February 15, 2015

Customizing QDials in Qt - Part 1

I am currently working on the Qt GUI for my C++ FM Synthesizer, Anthem, and wanted to share a particularly fun and interesting bit of that process in this post, namely how to customize the QDial class in Qt. While Qt generally provides a myriad of styling and customization options for all of its widgets, its developers seem to have forgotten about QDial. Out of the box, your only styling option for QDial is to keep it exactly how it is. But is that going to stop us from creating super sassy dials for our GUI projects? No!

I will show you how to create these two types of dials with fully customizable colors:


This tutorial will provide a general introduction and explain the implementation of the first dial. Part two will deal with the second dial shown.

When Qt draws a widget on the screen, it calls the widget's paintEvent() method, which then proceeds to paint the necessary rectangles, ellipses, lines and other elements and fills them with colors, shades and gradients to provide for a visual representation of the actions the widget is supposed to perform. For example, in Qt's implementation, QDial::paintEvent(QPaintEvent* pe) looks like so:

void QDial::paintEvent(QPaintEvent *)
{
    QStylePainter p(this);
    QStyleOptionSlider option;
    initStyleOption(&option);
    p.drawComplexControl(QStyle::CC_Dial, option);
}

The QPaintEvent object provides information about the region the widget is supposed to be drawn in, but this argument is usually ignored, as the rendered Widget normally fills the whole area available to it and not just a specific region. If you then spend 15 minutes following up the call chain to look for the piece of source code in Qt's repository that actually implements the drawing of QDial, just so that you can show it off in your tutorial, you'll find that this is how Qt draws its QDial (found here):

if (const QStyleOptionSlider *dial = qstyleoption_cast(opt)) {
            // OK, this is more a port of things over
            p->save();

            // avoid dithering
            if (p->paintEngine()->hasFeature(QPaintEngine::Antialiasing))
                p->setRenderHint(QPainter::Antialiasing);

            int width = dial->rect.width();
            int height = dial->rect.height();
            qreal r = qMin(width, height) / 2.0;
            qreal d_ = r / 6.0;
            qreal dx = dial->rect.x() + d_ + (width - 2 * r) / 2.0 + 1;
            qreal dy = dial->rect.y() + d_ + (height - 2 * r) / 2.0 + 1;
            QRect br = QRect(int(dx), int(dy), int(r * 2 - 2 * d_ - 2), int(r * 2 - 2 * d_ - 2));

            QPalette pal = opt->palette;
            // draw notches
            if (dial->subControls & QStyle::SC_DialTickmarks) {
                p->setPen(pal.foreground().color());
                p->drawLines(calcLines(dial, widget));
            }

            if (dial->state & State_Enabled) {
                p->setBrush(pal.brush(QPalette::ColorRole(styleHint(SH_Dial_BackgroundRole,
                                                                    dial, widget))));
                p->setPen(Qt::NoPen);
                p->drawEllipse(br);
                p->setBrush(Qt::NoBrush);
            }
            p->setPen(QPen(pal.dark().color()));
            p->drawArc(br, 60 * 16, 180 * 16);
            p->setPen(QPen(pal.light().color()));
            p->drawArc(br, 240 * 16, 180 * 16);

            qreal a;
            QPolygonF arrow(calcArrow(dial, a));

            p->setPen(Qt::NoPen);
            p->setBrush(pal.button());
            p->drawPolygon(arrow);

            a = angle(QPointF(width / 2, height / 2), arrow[0]);
            p->setBrush(Qt::NoBrush);

            if (a <= 0 || a > 200) {
                p->setPen(pal.light().color());
                p->drawLine(arrow[2], arrow[0]);
                p->drawLine(arrow[1], arrow[2]);
                p->setPen(pal.dark().color());
                p->drawLine(arrow[0], arrow[1]);
            } else if (a > 0 && a < 45) {
                p->setPen(pal.light().color());
                p->drawLine(arrow[2], arrow[0]);
                p->setPen(pal.dark().color());
                p->drawLine(arrow[1], arrow[2]);
                p->drawLine(arrow[0], arrow[1]);
            } else if (a >= 45 && a < 135) {
                p->setPen(pal.dark().color());
                p->drawLine(arrow[2], arrow[0]);
                p->drawLine(arrow[1], arrow[2]);
                p->setPen(pal.light().color());
                p->drawLine(arrow[0], arrow[1]);
            } else if (a >= 135 && a < 200) {
                p->setPen(pal.dark().color());
                p->drawLine(arrow[2], arrow[0]);
                p->setPen(pal.light().color());
                p->drawLine(arrow[0], arrow[1]);
                p->drawLine(arrow[1], arrow[2]);
            }

            // draw focus rect around the dial
            QStyleOptionFocusRect fropt;
            fropt.rect = dial->rect;
            fropt.state = dial->state;
            fropt.palette = dial->palette;
            if (fropt.state & QStyle::State_HasFocus) {
                br.adjust(0, 0, 2, 2);
                if (dial->subControls & SC_DialTickmarks) {
                    int r = qMin(width, height) / 2;
                    br.translate(-r / 6, - r / 6);
                    br.setWidth(br.width() + r / 3);
                    br.setHeight(br.height() + r / 3);
                }
                fropt.rect = br.adjusted(-2, -2, 2, 2);
                drawPrimitive(QStyle::PE_FrameFocusRect, &fropt, p, widget);
            }
            p->restore();
        }

Why am I showing you this? Because to customize a QDial, we have to re-paint it from scratch. Which is quite fun (and not so complicated as it looks here)! In general, when Qt provides no simple or intuitive way to style a QDial from a stylesheet or when its default rendering is an ... erm, "unpleasant sight", it is best to do a low-level re-paint of the widget.

For our first dial type, we want a static background circle as a surface for a movable, smaller circle that acts as the actual "knob" of the dial. The smaller circle (knob) will rotate around the edge of the background circle (dial). The angle at which the smaller circle is drawn relative to the center of the background circle will depend on the value of the dial. Just like the developers of the original QDial class, we also don't want our knob to go from 0 to 360 degrees, which would be visually unintuitive to the user (is it at 0 or 360 degrees?), but move within some other range. To keep things simple, we'll just use 90 degrees less for the total range. Moreover, we want the knob not to go from 0 degrees to 270 (center right to bottom), but rather from 225 degrees to -45 (or 315, but in this case we're going backwards). What you can take from all of this is that we'll have to do some trigonometry. Yey! Lastly, some words on styling. I love Qt's CSS (or QSS) feature, so we'll want full integration and support for styling from stylesheets for the dial's color and the knob's color, margin and size.

Our first step on the road to custom dials is subclassing the QDial class:

#ifndef CUSTOMDIAL_HPP
#define CUSTOMDIAL_HPP

#include <QDial>

class CustomDial : public QDial
{
    Q_OBJECT

    Q_PROPERTY(double knobRadius READ getKnobRadius WRITE setKnobRadius)

    Q_PROPERTY(double knobMargin READ getKnobMargin WRITE setKnobMargin)

public:

    CustomDial(QWidget * parent = nullptr,
               double knobRadius = 5,
               double knobMargin = 5);

    void setKnobRadius(double radius);

    double getKnobRadius() const;

    void setKnobMargin(double margin);

    double getKnobMargin() const;

private:

    virtual void paintEvent(QPaintEvent*) override;

    double knobRadius_;

    double knobMargin_;
};

#endif // CUSTOMDIAL_HPP

Besides the paintEvent() method to re-draw our widget, we also have knob radius and margin variables and appropriate accessors. Moreover, notice the Q_PROPERTY definitions, which will let us access these variables from a stylesheet.

This is the full definition of the CustomDial class and specifically of CustomDial::paintEvent():

#include "CustomDial.hpp"

#include <QPainter>
#include <QColor>

#include <cmath>

CustomDial::CustomDial(QWidget* parent,
                       double knobRadius,
                       double knobMargin)
: QDial(parent),
  knobRadius_(knobRadius),
  knobMargin_(knobMargin)
{
    // Default range
    QDial::setRange(0,100);
}

void CustomDial::setKnobRadius(double radius)
{
    knobRadius_ = radius;
}

double CustomDial::getKnobRadius() const
{
    return knobRadius_;
}

void CustomDial::setKnobMargin(double margin)
{
    knobMargin_ = margin;
}

double CustomDial::getKnobMargin() const
{
    return knobMargin_;
}

void CustomDial::paintEvent(QPaintEvent*)
{
    static const double degree270 = 1.5 * M_PI;

    static const double degree225 = 1.25 * M_PI;

    QPainter painter(this);

    // So that we can use the background color
    painter.setBackgroundMode(Qt::OpaqueMode);

    // Smooth out the circle
    painter.setRenderHint(QPainter::Antialiasing);

    // Use background color
    painter.setBrush(painter.background());

    // Store color from stylesheet, pen will be overriden
    QColor pointColor(painter.pen().color());

    // No border
    painter.setPen(QPen(Qt::NoPen));

    // Draw first circle
    painter.drawEllipse(0, 0, QDial::height(), QDial::height());

    // Reset color to pointColor from stylesheet
    painter.setBrush(QBrush(pointColor));

    // Get ratio between current value and maximum to calculate angle
    double ratio = static_cast(QDial::value()) / QDial::maximum();

    // The maximum amount of degrees is 270, offset by 225
    double angle = ratio * degree270 - degree225;

    // Radius of background circle
    double r = QDial::height() / 2.0;

    // Add r to have (0,0) in center of dial
    double y = sin(angle) * (r - knobRadius_ - knobMargin_) + r;

    double x = cos(angle) * (r - knobRadius_ - knobMargin_) + r;

    // Draw the ellipse
    painter.drawEllipse(QPointF(x,y),knobRadius_, knobRadius_);
}

The constructor just passes the QWidget parent pointer to QDial's constructor and also sets a default range of [0, 100] for the dial. Of course, all public and protected methods of QDial are also accessible from CustomDial, so we can reset this range outside of the constructor if we need to later on.

Now to paintEvent().

To position our knob on the dial, we'll need some trigonometry, which, when used with circles, usually involves Pi, so we'll want to have some of that in our code somewhere. Because Pi is not destined to change in the foreseeable future,  we can have two const doubles that we scale appropriately for the angles we need (1.5 * pi = 270 degrees; 1.25 * pi = 225 degrees) and which we also make static, so that they are initialized only once for this function.

Next, we need a QPainter object that will do the actual painting and rendering for us. Its constructor's only argument is the QPaintDevice that it it supposed to draw on, in this case "this" -- our dial widget. Also, we set the render hint QPainter::Antialising, to get smooth circles, using painter.setRenderHint().

In order to use the background color from a stylesheet (set either by "background: ...;" or "background-color: ...;" in CSS), we need to set our CustomDial class' background mode to Qt::OpaqueMode. This will activate the background color for the painter object and we can safely retrieve the color that was set in the stylesheet with painter.background(), which returns a QBrush object (for filling). If we needed the QColor object with the background color itself, we could get it with painter.background().color(). However, given that the next step is to set the brush for the background circle we're about to draw, we can just use the brush object itself and set it as the painter's current brush by passing it to painter.setBrush(). By default, the painter will also draw a border around the circle. No thanks. The border and its color is determined by the painter's current QPen object, so to disable the border entirely, we just call painter.setPen(QPen(Qt::NoPen)), which will set the painter's pen to an invisible one. However, before we get rid of the pen, we need to retrieve its color, as this is the other property that can be set using stylesheets ("color" property in CSS) and which we need for the knob color. So, first store the pen's color, then get rid of the pen.

Next up, we can finally draw our first circle. The painter's method for this is unfortunately not drawCircle(), but drawEllipse(), which means we have to pass the same diameter twice to get a circle. I hope you will survive the extra effort. drawEllipse() takes the x and y coordinates to start the drawing for, and then a width and height to determine the size of the ellipse. We draw the ellipse starting in the top left corner (0, 0) and get its diameter from the height of the CustomDial widget. This means that you can (and have to) set the size of the dial using CustomDial::setFixedSize() or any other resizing method.

Once we have the background circle drawn, we can move on to the smaller knob circle. First, we reset the brush of the painter so that it uses the color we retrieved from the stylesheet earlier. Then, it is time to math (I know that's not a verb). So, we calculate the ratio between the current dial value and its maximum, and from that ratio then determine the angle at which we'll draw the knob. Remember, the maximum angle is 270 degrees, and we offset it by -225 degrees to get our preferred range of angles. Knowing that in a circle, the sine of an angle is equal to the opposite side (our y coordinate) divided by the hypothenuse (or radius), and the cosine of that angle to the adjacent side (our x coordinate) divided by the radius, we can reform these equations to get our x and y coordinates. Note the two offsets. The first, (r - knobRadius_ - knobMargin_), essentially makes the available background circle space for the knob smaller, so that it won't stick to the dial's edges. The second offset, + r, ensures that position (0, 0) is in the center of the background circle and not in the top left corner.

Finally, we draw our knob circle by calling painter.drawEllipse() again, this time the overload that has a center QPointF with our x and y coordinates as its first argument and then two radii as its second and third argument. These radii are both the same for a circle.

To customize the look of our dial, we can use CSS / QSS stylesheets, as promised:

CustomDial
{
    background-color: #27272B;
    color: #FFFFFF;
    qproperty-knobRadius: 5;
    qproperty-knobMargin: 5;
}

These properties are also accessible via CustomDial::setStylesheet(), of course:

CustomDial* dial = new CustomDial(this);

dial->setStyleSheet("background-color: #27272B; color: #FFFFFF;");
dial->setStyleSheet("qproperty-knobMargin: 5; qproperty-knobMargin: 5;");

And that'll be it for this part of the tutorial! I hope you learned something and will be back for the second part.

Saturday, September 20, 2014

Building a text editor with PyQt


I have always enjoyed building beautiful Graphical User Interfaces (GUIs) to the back-end computations, number-crunching and algorithms of my programs. For Python, my GUI library of choice is the Python binding for Qt, PyQt. This tutorial will show you how you can use PyQt to build a simple but useful rich-text editor. The first part of the tutorial will focus on the core features and skeleton of the editor. In the second part of the tutorial we'll take care of text-formatting and in the third part we'll add some useful extensions like a find-and-replace dialog, support for tables and more.

Before we get started, two things:


Once you`re set up and ready to go, we can embark on our journey to create a totally awesome text editor.

An empty canvas

We start out with an empty canvas, a bare-minimum PyQt application:

import sys
from PyQt4 import QtGui, QtCore
from PyQt4.QtCore import Qt

class Main(QtGui.QMainWindow):

    def __init__(self, parent = None):
        QtGui.QMainWindow.__init__(self,parent)

        self.initUI()

    def initUI(self):

        # x and y coordinates on the screen, width, height
        self.setGeometry(100,100,1030,800)

        self.setWindowTitle("Writer")

def main():

    app = QtGui.QApplication(sys.argv)

    main = Main()
    main.show()

    sys.exit(app.exec_())

if __name__ == "__main__":
    main()

The first thing we need to do is import the sys module, which PyQt needs to start our application, as well as all the necessary modules from the PyQt4 package (PyQt5 if you have the newer version).

We'll call our class Main and let it inherit from PyQt's QMainWindow class. In the __init__ method, we initialize the parent class as well as all the UI settings for our application. The latter we just pack into the initUI() method. At the moment, the only settings we need are those concerning position on the screen, the size of the window and the window's title. We can set the first two using the setGeometry() method, which lets us set the x and y coordinates of the window on the screen, the width and lastly its height. We also set our application's window title using the setWindowTitle() method. For simplicity, we'll just call our text editor Writer.

Lastly, we need a main function that takes care of instantiating and displaying our window. We do so by creating a new Main object and calling its show() method.

And there was text

Now that we have a basic PyQt application up and running, we can start making it look more like a text editor:

def initToolbar(self):

  self.toolbar = self.addToolBar("Options")

  # Makes the next toolbar appear underneath this one
  self.addToolBarBreak()

def initFormatbar(self):

  self.formatbar = self.addToolBar("Format")

def initMenubar(self):

  menubar = self.menuBar()

  file = menubar.addMenu("File")
  edit = menubar.addMenu("Edit")
  view = menubar.addMenu("View")

def initUI(self):

    self.text = QtGui.QTextEdit(self)
    self.setCentralWidget(self.text)

    self.initToolbar()
    self.initFormatbar()
    self.initMenubar()

    # Initialize a statusbar for the window
    self.statusbar = self.statusBar()

    # x and y coordinates on the screen, width, height

    self.setGeometry(100,100,1030,800)

    self.setWindowTitle("Writer")

I left out everything that stayed unchanged from the previous code. As you can see in the initUI() function, we first create a QTextEdit object and set it to our window's "central widget". This makes the QTextEdit object take up the window's entire space. Next up, we need to create three more methods: initToolbar(), initFormatbar() and initMenubar(). The first two methods create toolbars that will appear at the top of our window and contain our text editor's features, such as those concerning file management (opening a file, saving a file etc.) or text-formatting. The last method, initMenubar() creates a set of drop-down menus at the top of the screen.
As of now, the methods contain only the code necessary to make them appear.

For the initToolbar() and initFormatbar() methods, this means creating a new toolbar object by calling our window's addToolBar() method and passing it the name of the toolbar we're creating. Note that in the initToolbar() method, we need to also call the addToolBarBreak() method. This makes the next toolbar, the format bar, appear underneath this toolbar. In case of the menu bar, we call the window's menuBar() method and add three menus to it, "File", "Edit" and "View". We'll populate all of these toolbars and menus in a bit.

Lastly, in the initUI() method, we also create a status bar object. This will create a status bar at the bottom of our window.

An icon is worth a thousand words

Before we start injecting some life into our text editor, we're going to need some icons for its various features. If you had a look at the GitHub repository I linked to at the top of this post, you might have noticed that it contains a folder full of icons. I recommend that you download the repo (if you haven't yet) and copy the icons folder into your working directory. The icons are from iconmonstr, completely free and require no attribution.

File management

Now that we have a basic text editor skeleton in place, we can add some meat to the bone. We'll start with the functions concerning file management.

__init__():

def __init__(self, parent = None):
    QtGui.QMainWindow.__init__(self,parent)

    self.filename = ""

    self.initUI()

initToolbar():

def initToolbar(self):

  self.newAction = QtGui.QAction(QtGui.QIcon("icons/new.png"),"New",self)
  self.newAction.setStatusTip("Create a new document from scratch.")
  self.newAction.setShortcut("Ctrl+N")
  self.newAction.triggered.connect(self.new)

  self.openAction = QtGui.QAction(QtGui.QIcon("icons/open.png"),"Open file",self)
  self.openAction.setStatusTip("Open existing document")
  self.openAction.setShortcut("Ctrl+O")
  self.openAction.triggered.connect(self.open)

  self.saveAction = QtGui.QAction(QtGui.QIcon("icons/save.png"),"Save",self)
  self.saveAction.setStatusTip("Save document")
  self.saveAction.setShortcut("Ctrl+S")
  self.saveAction.triggered.connect(self.save)

  self.toolbar = self.addToolBar("Options")

  self.toolbar.addAction(self.newAction)
  self.toolbar.addAction(self.openAction)
  self.toolbar.addAction(self.saveAction)

  self.toolbar.addSeparator()

  # Makes the next toolbar appear underneath this one
  self.addToolBarBreak()

initMenubar():

file.addAction(self.newAction)
file.addAction(self.openAction)
file.addAction(self.saveAction)

Below the initUI() method:

def new(self):

    spawn = Main(self)
    spawn.show()

def open(self):

    # Get filename and show only .writer files
    self.filename = QtGui.QFileDialog.getOpenFileName(self, 'Open File',".","(*.writer)")

    if self.filename:
        with open(self.filename,"rt") as file:
            self.text.setText(file.read())

def save(self):

    # Only open dialog if there is no filename yet
    if not self.filename:
        self.filename = QtGui.QFileDialog.getSaveFileName(self, 'Save File')

    # Append extension if not there yet
    if not self.filename.endswith(".writer"):
        self.filename += ".writer"

    # We just store the contents of the text file along with the
    # format in html, which Qt does in a very nice way for us
    with open(self.filename,"wt") as file:
        file.write(self.text.toHtml())

As you might have noticed, all the actions we'll be creating for our text editor follow the same code pattern:
  • Create a QAction and pass it an icon and a name
  • Create a status tip, which will display a message in the status bar (and a tool tip if you hover the action)
  • Create a shortcut
  • Connect the QAction's triggered signal to a slot function
Once you've done this for the "new", "open" and "save" actions, you can add them to the toolbar, using the toolbar's addAction() method. Make sure you also call the addSeparator() method, which inserts a separator line between toolbar actions. Because these three actions are responsible for file management, we want to add a separator here. Also, we want to add these three actions to the "file" menu, so in the initMenubar() method, we add the three actions to the appropriate menu.
Next up, we need to create the three slot functions that we connected to our action in the initToolbar() method. The new() method is very easy, all it does is create a new instance of our window and call its show() method to display it.

Before we create the last two methods, let me mention that we'll use ".writer" as our text files' extensions. Now, for open(), we need to open PyQt's getOpenFileName dialog. This opens a file dialog which returns the name of the file the user opens. We also pass this method a title for the file dialog, in this case "Open File", the directory to open initially, "." (current directory) and finally a file filter, so that we only show ".writer" files. If the user didn't close or cancel the file dialog, we open the file and set its text to our text editor's current text.

Lastly, the save() method. We first check whether the current file already has a file name associated with it, either because it was opened with the open() method or already saved before, in case of a new text file. If this isn't the case, we open a getSaveFileName dialog which will again return a filename for us, given the user doesn't cancel or close the file dialog. Once we have a file name, we need to check whether the user already entered our extension when saving the file. If not, we add the extension. Finally, we save our file in HTML format (which stores style as well), using the QTextEdit's toHTML() method.

Printing

Next, we'll create some actions for printing and preview-ing our document.

initToolbar():

self.printAction = QtGui.QAction(QtGui.QIcon("icons/print.png"),"Print document",self)
self.printAction.setStatusTip("Print document")
self.printAction.setShortcut("Ctrl+P")
self.printAction.triggered.connect(self.print)

self.previewAction = QtGui.QAction(QtGui.QIcon("icons/preview.png"),"Page view",self)
self.previewAction.setStatusTip("Preview page before printing")
self.previewAction.setShortcut("Ctrl+Shift+P")
self.previewAction.triggered.connect(self.preview)

Further below:

self.toolbar.addAction(self.printAction)
self.toolbar.addAction(self.previewAction)

self.toolbar.addSeparator()

initMenubar():

file.addAction(self.printAction)
file.addAction(self.previewAction)

Below the initUI() method:

def preview(self):

    # Open preview dialog
    preview = QtGui.QPrintPreviewDialog()

    # If a print is requested, open print dialog
    preview.paintRequested.connect(lambda p: self.text.print_(p))

    preview.exec_()

def print(self):

    # Open printing dialog
    dialog = QtGui.QPrintDialog()

    if dialog.exec_() == QtGui.QDialog.Accepted:
        self.text.document().print_(dialog.printer())

We create the actions following the same scheme as we did for the file management actions and add them to our toolbar as well as the "file" menu. The preview() method opens a QPrintPreviewDialog and optionally prints the document, if the user wishes to do so. The print() method opens a QPrintDialog and prints the document if the user accepts.

Copy and paste - undo and redo

These actions will let us copy, cut and paste text as well as undo/redo actions:

initToolbar():

self.cutAction = QtGui.QAction(QtGui.QIcon("icons/cut.png"),"Cut to clipboard",self)
self.cutAction.setStatusTip("Delete and copy text to clipboard")
self.cutAction.setShortcut("Ctrl+X")
self.cutAction.triggered.connect(self.text.cut)

self.copyAction = QtGui.QAction(QtGui.QIcon("icons/copy.png"),"Copy to clipboard",self)
self.copyAction.setStatusTip("Copy text to clipboard")
self.copyAction.setShortcut("Ctrl+C")
self.copyAction.triggered.connect(self.text.copy)

self.pasteAction = QtGui.QAction(QtGui.QIcon("icons/paste.png"),"Paste from clipboard",self)
self.pasteAction.setStatusTip("Paste text from clipboard")
self.pasteAction.setShortcut("Ctrl+V")
self.pasteAction.triggered.connect(self.text.paste)

self.undoAction = QtGui.QAction(QtGui.QIcon("icons/undo.png"),"Undo last action",self)
self.undoAction.setStatusTip("Undo last action")
self.undoAction.setShortcut("Ctrl+Z")
self.undoAction.triggered.connect(self.text.undo)

self.redoAction = QtGui.QAction(QtGui.QIcon("icons/redo.png"),"Redo last undone thing",self)
self.redoAction.setStatusTip("Redo last undone thing")
self.redoAction.setShortcut("Ctrl+Y")
self.redoAction.triggered.connect(self.text.redo)

Further below:

self.toolbar.addAction(self.cutAction)
self.toolbar.addAction(self.copyAction)
self.toolbar.addAction(self.pasteAction)
self.toolbar.addAction(self.undoAction)
self.toolbar.addAction(self.redoAction)

self.toolbar.addSeparator()

initMenubar():

edit.addAction(self.undoAction)
edit.addAction(self.redoAction)
edit.addAction(self.cutAction)
edit.addAction(self.copyAction)
edit.addAction(self.pasteAction)

As you can see, we don't need any separate slot functions for these actions, as our QTextEdit object already has very handy methods for all of these actions. Note that in the initMenubar() method, we add these actions to the "Edit" menu and not the "File" menu.

Lists

Finally, we'll add two actions for inserting lists. One for numbered lists and one for bulleted lists:

initToolbar():

bulletAction = QtGui.QAction(QtGui.QIcon("icons/bullet.png"),"Insert bullet List",self)
bulletAction.setStatusTip("Insert bullet list")
bulletAction.setShortcut("Ctrl+Shift+B")
bulletAction.triggered.connect(self.bulletList)

numberedAction = QtGui.QAction(QtGui.QIcon("icons/number.png"),"Insert numbered List",self)
numberedAction.setStatusTip("Insert numbered list")
numberedAction.setShortcut("Ctrl+Shift+L")
numberedAction.triggered.connect(self.numberList)

Further below:

self.toolbar.addAction(bulletAction)
self.toolbar.addAction(numberedAction)

Below the initUI() method:

    def bulletList(self):

        cursor = self.text.textCursor()

        # Insert bulleted list
        cursor.insertList(QtGui.QTextListFormat.ListDisc)

    def numberList(self):

        cursor = self.text.textCursor()

        # Insert list with numbers
        cursor.insertList(QtGui.QTextListFormat.ListDecimal)

As you can see, we don't make these actions class members because we don't need to access them anywhere else in our code, we only need to create and use them within the scope of initToolbar().
Concerning the slot functions, we retrieve our QTextEdit's QTextCursor, which has a lot of very useful methods, such insertList(), which, well, does what it's supposed to do. In case of bulletList(), we insert a list with the QTextListFormat set to ListDisc. For numberList(), we insert a list with ListDecimal format.

Final changes

To finish off this part of Building a text editor with PyQt, let's make some final changes in the initUI() method:

self.text.setTabStopWidth(33)


Because PyQt's tab width is very strange, I recommend you set the QTextEdit's "tab stop width" to 33 pixels, which is around 8 spaces.

self.setWindowIcon(QtGui.QIcon("icons/icon.png"))


Now that we have icons, we can add an icon for our window.

self.text.cursorPositionChanged.connect(self.cursorPosition


By connecting our QTextEdit's cursorPositionChanged signal to a function, we can display the cursor's current line and column number in the status bar. Here is the corresponding slot function, below initUI():

def cursorPosition(self):

    cursor = self.text.textCursor()

    # Mortals like 1-indexed things
    line = cursor.blockNumber() + 1
    col = cursor.columnNumber()

    self.statusbar.showMessage("Line: {} | Column: {}".format(line,col))

We first retrieve our QTextEdit's QTextCursor, then grab the cursor's column and block/line number and finally display these numbers in the status bar.

That'll be it for this part of the series. See you soon.

Originally published on BinPress.

Thursday, July 24, 2014

Xcode and Libraries

Since the dawn of the human species around 200.000 B.C. (Before Computers), countless hours have been wasted by software developers trying to include a library in their project. In most cases, what's missing is definite clarity about the process. Even though you might find some hacky way of building your library from source and somehow getting it to work in your project after furiously interrogating Google, the results are often neither optimal, nor sustainable.

In this post I will describe the three simple and quick steps that will take you from wanting a library, to including and using it in your Xcode project on Mac OS X.

If you've stumbled upon this post in your hunt for quick solutions, do this to make everything work:

1. Download Brew. From a command line, do brew search <library>, if your library's available, do brew install <library>.

2. In Xcode, click on your project name next to the blue icon, at the very top of your files/directories, which will open your project's configuration settings. Go to the Search paths menu. For the Header Search Paths, insert /usr/local/include.

3.  At the top of this configuration settings page, you'll see three tabs: Build Settings, Build Phases and Build Rules. Click on Build Phases. Click on the Link Binary with Libraries menu. Click the little plus sign in the bottom left corner. Click on Add Other. Do ⌘ + Shift + G and type /usr/local/lib. Click on the .dylib you want to include and add it.

4. Profit

Now, if you want to know why you did these things and what you're actually doing, or need some pictures and explanations for these steps, read on. 

1. Getting the library

Most struggles people have with libraries stem from the initial process of getting the library you want onto your computer. What do I mean? Don't you just extrude the files from the glorious womb of the interwebs and plant them somewhere on my system? No, no you don't. What you need is a package-manager, namely Homebrew. If you've ever used Linux and installed applications on it, you most likely will have come across something like apt-get, so you should be familiar with what a package manager is. For everyone else, a package manager is a handy command-line utility that takes care of downloading and installing (in the right places) a certain library/application as well as all of its dependencies. I strongly recommend you download Homebrew.

Now, since package-managers are maintained by humans, who cannot know of every library in the world, some libraries might not be available via Brew. However, more often than not you will find what you're looking for and in any case, it should be your first resort.

Example

For the purpose of showing you how easy it is to use brew, I will download the Boost C++ library. Do the same things for your library, but change the name of course.

Open up a command line, go to your kitchen and make a sandwich. Ok maybe do the last part later on. From the command line, let's first see whether you have brew installed. To do that, simply type brew into your terminal. This should come up:


If bash couldn't find the brew command, you probably didn't install Homebrew correctly. To the Google! Installing Homebrew.

If the above command works, we can look to see whether Brew has the library we want, by issuing the brew search <library> command, so, in my case:


As you can see, brew found three libraries that include the name "boost". If brew also found your library, it is now time to install the library. Do brew install <library>, so for me:


If the above command worked, you should now be the proud owner of a library. Congratulations. What brew did for you, here, is install all the right files in all the right places, meaning the necessary header files went into /usr/local/include and the library against which you'll have to link your project later on went into /usr/local/lib. Also, if your library depended on any vital other libraries, brew took care of installing those for you too.

Help! It didn't work! What now?

If the installation of your library failed for some reason, consult Homebrew's built-in debug utility, the brew doctor. Brew's doctor examines your system for some basic errors and warns you about a bunch of things that could get in the way of installing a package. For example, this comes up when running brew doctor for me:


As you can see, brew is warning me about a few issues that could come up at one time or another. If the doctor doesn't help, consult your search engine of choice.

2. Including the Header files

Now that we have the library installed, we can move on to making the library work in our Xcode project. For example purposes, I have created an Xcode project called Potato. Your workspace will most likely look something like this:


At the top of your file/directory listing on the left of your screen, you can see the name of your project, in my case Potato, next to the blue icon with the 'A' on it. Click on it, this will open your project's configuration settings:


Now, find the Search Paths menu by either scrolling down or by typing in 'Search Paths' in the search bar you can see in the top right corner there.

The Search Paths menu should look like this:


What we're looking for here is the Header Search Paths tab, in the middle of the menu. Click on it and hit enter, which lets you type in a path. Enter the path /usr/local/include, the path where brew installed our header files. Now you have access to all the header files of the library. You can include them in your project now! However, there is a final step left:

3. Including the library

The last thing we have to do is include the library, which is stored in a .dynlib file in the /usr/local/lib directory. The dynlib, or dynamic library, is a collection of implementation files for our library. We need to link it to our project.

At the very top of this configuration page, you can see three tabs, Build Settings, Build Phases and Build Rules:


Click on the Build Phases tab, which will open a new configuration page. On it, you will see a menu Link binary with libraries. Click on it. In the bottom left corner, you can see a little plus sign, which you need to click again. This will open a new window:


Here you can find OS X's built-in frameworks. Should you need to include any of those libraries or frameworks, you can add them here. If you're looking for an external library, like I'm looking for boost, you need to click on the Add Other button. This will enable you to search for a framework or library anywhere you want to. Hit ⌘ + Shift + G and type /usr/local/lib into the little window that pops up. This will take you to the folder where Brew installed our dynlib file. Look for it and add it by clicking on it and pressing the Add button in the bottom right corner. 

That's it, build your project, you're set to go.

Cheers. 

Sunday, July 20, 2014

Creating complex waveforms through Fourier / Additive Synthesis - Version 2

In the last post in my "Developing a digital synthesizer in C++" series, I described how Fourier Synthesis, also known as Additive synthesis, could be used to create complex waveforms of any shape or form. In the recent months I have continued to work on my synthesizer and progressed a lot with my knowledge, therefore I have revised and improved lots of my code, including my functions for creating complex waveforms. Because the source code I provided in the last post has lots of problems, I decided to publish my revised code. I will only explain why and how I changed the previous code, so I recommend you have a look at the previous post if you haven't yet, especially if you want to learn about Fourier synthesis in general.

The main problem with the previous code was that it was not generic at all and actually didn't follow one of the basic rules about functions: they should do one thing and one thing only. The function might be good enough if you want to create only a handful of different waveforms, say square, sine and saw, but as soon as we're talking about creating any waveform we want to, using the same function, we'd be getting into problems pretty soon. The solution I found to this problem is quite nice, but it requires a few more initial steps.

In Fourier Synthesis, a partial is generally described by its frequency, its amplitude and optionally its phase offset. Because a partial is an integer multiple of a fundamental frequency and given the fact that wavetables usually store waveforms with a period of exactly 1 Hertz, the frequency is directly related to the number of the partial, so that's all we need.

Now that we know what information we need about each partial, we can create such a struct:

struct Partial
{
    Partial(unsigned short number, double ampl, double phsOffs = 0)
    : num(number), amp(ampl), phaseOffs(phsOffs)
    { }
    
    const unsigned short num;
    double amp;
        
    double phaseOffs;
};

Each partial has a number, which stays constant, an amplitude that we might want to change and also a variable phase offset, in radians, which we'll usually just set to 0 (no offset).

If you recall from my introductory post on complex waveforms and also from my last post on Fourier synthesis, every waveform has a distinct "algorithm" which determines how we get from a bunch of sine waves to, say, a square wave.

Speaking of square waves, they are formed by adding all odd partials (the 1st, 3rd, 5th etc.). To avoid amplitude overflow, we must also set each partial's amplitude to the inverse of their respective partial number, so the 3rd partial has 1/3rd the maximum amplitude of the fundamental sine wave for example. Usually the fundamental sine wave has an amplitude of 1, so the amplitude of the partials is literally just the inverse of their partial number.

We can therefore have a vector of Partials for any waveform we want, by just changing the settings of the partials. For a square wave with 64 partials:

std::vector<Partial> vec;
    
for (int i = 1; i < 128; i += 2)
{
    vec.push_back(Partial(i, 1.0/i));
}

Simple! We construct the first 64 odd-numbered partials with their number and their amplitude.

A saw wave would be:

for (int i = 1; i <= 64; ++i)
{
    vec.push_back(Partial(i,1.0/i));
}

For a ramp wave, change the amplitude's sign in the above code (-1.0/i).

And a triangle wave (odd partials, alternating sign for the amplitude):

double amp = -1; // So that the first amplitude is positive

for (int i = 1; i < 128; i += 2)
{
    amp = (amp > 0) ? (-1.0/(i*i)) : (1.0 / (i*i));
    
    vec.push_back(Partial(i,amp));
}

Now that we have these vectors for our waveforms, here is the function that creates a wavetable for them:

double * Wavetable::genWave(const partVec& partials,
                            double masterAmp,
                            unsigned int wtLen,
                            bool sigmaAprox)
{
    double * wt = new double [wtLen];
    
    double * amp = new double [partials.size()];
    double * phase = new double [partials.size()];
    double * phaseIncr = new double [partials.size()];
    
    // constant sigma constant part
    double sigmaK = PI / partials.size();
    
    // variable part
    double sigmaV;
   
    // 2*pi / wavetable is the fundamental increment (gives one period
    // of a pure sine wave in the wavetable)
    const double fundIncr = 6.2831853071795865 / wtLen;

    // fill the arrays with the respective partial values
    for (unsigned short p = 0; p < partials.size(); p++)
    {
        phase[p] = partials[p].phaseOffs;
        
        phaseIncr[p] = fundIncr * partials[p].num;
        
        amp[p] = partials[p].amp * masterAmp;
        
        if (sigmaAprox)
        {
            sigmaV = sigmaK * partial.num;
            
            amp[p] *= sin(sigmaV) / sigmaV;
        }
    }
    
    for (unsigned int n = 0; n < wtLen; n++)
    {
        double value = 0.0;
        
        // do additive magic
        for (unsigned short p = 0; p < partials.size(); p++)
        {
            value += sin(phase[p]) * amp[p];
            
            phase[p] += phaseIncr[p];
            
            if (phase[p] >= twoPI)
                phase[p] -= twoPI;
        }
        
        wt[n] = value;
        
    }

    delete [] phase;
    delete [] phaseIncr;
    delete [] amp;
    
    return wt;
    
}

I recommend reading the last post on Fourier synthesis, if you haven't yet, to understand what the function does. Once your done, I'm sure you'll agree with me that this method is a lot nicer. We have gotten rid of our ridiculous ID parameter and can now pass on a vector of partials containing information for any waveform we want. Have fun with it and comment below if you have any questions or suggestions.