Hi! Hope you're enjoying this blog. I have a new home at www.goldsborough.me. Be sure to also check by there for new posts <3
Showing posts with label Qt. Show all posts

Monday, March 9, 2015

Customizing QDials in Qt - Part 2

Welcome back to my tutorial on customizing QDials in Qt! In the first part of this tutorial I pointed out that while Qt gives us the possibility to style labels, buttons and many other widgets, there is no out-of-the-box way to customize QDials. I then explained that if we really do want to add some styling to a QDial, we have to subclass it and do a complete re-paint of the object. At the end of part one, you had this super awesome fully CSS-stylable dial:


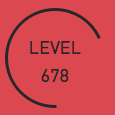
That's a dial. We know that. Why? Because all dials look like that -- we've seen it 12000 times and now + 1. Let's innovate! Let's make this dial:


In this case, we're not sliding a small circle around the edge of a bigger one, we're actually drawing an arc with a length of between 0 and 360 degrees. Moreover, because the arc takes up relatively little space on the dial, I've added support for showing a title string as well as the dial value in the center of  our widget. Don't worry if you don't like the dial's background color, font color, arc color or the width of the arc, you'll have full support for customizing those options to your liking using stylesheets!

So, I guess I'll just throw the declaration of our QDial subclass -- CustomDial -- at you:

#ifndef CUSTOMDIAL_HPP
#define CUSTOMDIAL_HPP

#include <QDial>
#include <QString>
#include <QSharedPointer>

class QColor;
class QRectF;
class QPen;

class CustomDial : public QDial
{
    Q_OBJECT
    
    Q_PROPERTY(QString arcColor READ getArcColor WRITE setArcColor)
    
    Q_PROPERTY(double arcWidth READ getArcWidth WRITE setArcWidth)
    
public:
    
    explicit CustomDial(QWidget* parent = nullptr);
    
    CustomDial(const QString& text,
               QWidget * parent = nullptr,
               int minimum = 0,
               int maximum = 999);
    
    
    void setArcColor(const QString& color);
    
    QString getArcColor() const;
    
    
    void setStartAngle(double angle);
    
    double getStartAngle() const;
    
    
    void setMaximumAngle(double angle);
    
    double getMaximumAngle() const;
    
    
    void setArcWidth(double px);
    
    double getArcWidth() const;
    
    
    void setText(const QString& text);
    
    QString getText() const;
    
    
private slots:
    
    void updateValue();
    
private:
    
    virtual void paintEvent(QPaintEvent*) override;
    
    virtual void resizeEvent(QResizeEvent* event) override;
    
    double maximumAngleSpan_;
    
    double startAngle_;
    
    double arcWidth_;
    
    double angleSpan_;
    
    QString valueString_;
    
    QString text_;
    
    QSharedPointer arcRect_;
    
    QSharedPointer valueRect_;
    
    QSharedPointer textRect_;
    
    QSharedPointer arcColor_;
    
    QSharedPointer arcPen_;
};

#endif // CUSTOMDIAL_HPP

I'll talk about a few important aspects of this class. As in the last example, we subclass our CustomDial class from the QDial class, given that we want to retain its behavior -- the way you can slide it in a circular motion to change its value -- as well as its interface -- e.g. setRange(), setValue() or any size-related method.

By declaring a Q_PROPERTY for the color and width of the dial's arc, we will later be able to modify and customize those values from a stylesheet. Just to re-cap: the Q_PROPERTY macro takes a data type as its first argument, e.g. a QString for the color (an overload of QColor's constructor takes an RGB hex triplet as string), then a name for the property -- in our case arcColor and arcWidth, respectively -- followed by READ and WRITE member functions to retrieve the value and write to it in case it is changed in a stylesheet. Note that the two other properties we want to be able to customize -- the dial's background and font color -- already have property definitions built-in: you can  access them via the "background" and "color" properties in CSS.

The public methods of our CustomDial class are just interface -- getters and setters. Our private slot updateValue() we'll later on connect to the QDial::valueChanged signal so that we can update our internal variables, i.e. the span of the arc as well as the value string we display in the center of our dial. Note that we could technically calculate the arc span and other variables dependent on the dial's value in the paintEvent() method itself, however to keep things nice and optimized we take those invariants out, thus ensuring that we perform no unnecessary calculations should the dial value between two separate calls to paintEvent() not change.

I'll also quickly talk about the class' private members. paintEvent() is our familiar friend, who paints the widget onto our application's window. resizeEvent() is another inherited method from QDial, that is called automatically whenever the dial is forced to resize. Because we keep the painting areas / rectangles for our dial arc, dial title as well as the dial value string stored for optimization purposes, we'll have to resize those rectangles whenever the widget has to resize. That's what we do in resizeEvent().

startAngle is the angle at which the arc of our dial starts (270° in the dial shown above) and maximumAngleSpan is the maximum span the arc can have (-360° above). As such, the arc's angle span for any given dial value will be between startAngle (minimum dial value) and startAngle + maximumAngleSpan (maximum dial value). The other variables should be self-explanatory or will become so when I talk about them further.

Here is the definition of the CustomDial class:

#include "CustomDial.hpp"

#include <QPainter>
#include <QColor>
#include <QLabel>
#include <QRectf>
#include <QPen>
#include <QResizeEvent>

CustomDial::CustomDial(QWidget* parent)
: QDial(parent)
{ }

CustomDial::CustomDial(const QString& text,
                       QWidget* parent,
                       int minimum,
                       int maximum)
: QDial(parent),
  text_(text),
  arcRect_(new QRectF),
  valueRect_(new QRectF),
  textRect_(new QRectF),
  arcColor_(new QColor),
  arcPen_(new QPen)
{
    QDial::setRange(minimum, maximum);
    
    QDial::setCursor(Qt::PointingHandCursor);
    
    connect(this, &QDial::valueChanged,
            this, &CustomDial::updateValue);
    
    setMinimumSize(100,100);
    
    setMaximumAngle(-360);
    
    setStartAngle(270);
    
    updateValue();
}

CustomDial::~CustomDial() = default;

void CustomDial::paintEvent(QPaintEvent*)
{
    QPainter painter(this);
    
    // So that we can use the background color
    // Otherwise the background is transparent
    painter.setBackgroundMode(Qt::OpaqueMode);
    
    // Smooth out the circle
    painter.setRenderHint(QPainter::Antialiasing);
    
    // Use background color
    painter.setBrush(painter.background());
    
    // Get current pen before resetting so we have
    // access to the color() method which returns the
    // color from the stylesheet
    QPen textPen = painter.pen();
    
    // No border
    painter.setPen(QPen(Qt::NoPen));
    
    // Draw background circle
    painter.drawEllipse(QDial::rect());
    
    painter.setPen(textPen);
    
    painter.drawText(*textRect_, Qt::AlignHCenter | Qt::AlignBottom, text_);
    
    painter.drawText(*valueRect_, Qt::AlignCenter, valueString_);
    
    painter.setPen(*arcPen_);
    
    painter.drawArc(*arcRect_, startAngle_, angleSpan_);
    
}

void CustomDial::resizeEvent(QResizeEvent* event)
{
    QDial::setMinimumSize(event->size());
    
    double width = QDial::width() - (2 * arcWidth_);
    
    double height = width / 2;
    
    *textRect_ = QRectF(arcWidth_, arcWidth_, width, height);
    
    *valueRect_ = QRectF(arcWidth_, height, width, height);
    
    *arcRect_ = QRectF(arcWidth_ / 2,
                       arcWidth_ / 2,
                       QDial::width() - arcWidth_,
                       QDial::height() - arcWidth_);
}

void CustomDial::updateValue()
{
    double value = QDial::value();
    
    // Get ratio between current value and maximum to calculate angle
    double ratio = value / QDial::maximum();
    
    angleSpan_ = maximumAngleSpan_ * ratio;
    
    valueString_ = QString::number(value);
}

void CustomDial::setArcWidth(double px)
{
    arcWidth_ = px;
    
    *arcRect_ = QRectF(arcWidth_ / 2,
                       arcWidth_ / 2,
                       QDial::width() - arcWidth_,
                       QDial::height() - arcWidth_);
    
    arcPen_->setWidth(arcWidth_);
}

void CustomDial::setText(const QString& text)
{
    text_ = text;
}

QString CustomDial::getText() const
{
    return text_;
}

double CustomDial::getArcWidth() const
{
    return arcWidth_;
}

void CustomDial::setMaximumAngle(double angle)
{
    maximumAngleSpan_ = angle * 16;
}

double CustomDial::getMaximumAngle() const
{
    return maximumAngleSpan_ / 16;
}

void CustomDial::setStartAngle(double angle)
{
    startAngle_ = angle * 16;
}

double CustomDial::getStartAngle() const
{
    return startAngle_ / 16;
}

void CustomDial::setArcColor(const QString& color)
{
    arcColor_->setNamedColor(color);
    
    arcPen_->setColor(*arcColor_);
}

QString CustomDial::getArcColor() const
{
    return arcColor_->name();
}

A lot of this is just interface. A lot of it is not. But before I talk about anything that doesn't concern the getters and setters you see here, I just want to tell you why you see the number 16 floating around here. The reason why we have to multiply all angles we use by 16, such as the arc's start angle or angle span, is that we later on have to call QPainter::drawArc(), whose documentation reads:

void QPainter::drawArc ( const QRectF & rectangle, int startAngle, int spanAngle ) 

Draws the arc defined by the given rectangle, startAngle and spanAngle. 

The startAngle and spanAngle must be specified in 1/16th of a degree, i.e. a full circle equals 5760 (16 * 360). Positive values for the angles mean counter-clockwise while negative values mean the clockwise direction. Zero degrees is at the 3 o'clock position.

That should explain it. I'll talk about a few other non-self-explanatory methods.

In CustomDial::setColor(), we update the color of the arc by calling QColor::setNamedColor() on our internal arcColor_ variable and passing it the RGB hex triplet we get as a QString (e.g. #FFFFFF). We also set this color directly to our private arcPen_ variable which we'll later use to draw the arc in CustomDial::paintEvent().

CustomDial::setArcWidth() is the function responsible for, as the name implies, updating the width of the arc. When the width of the arc changes, we also have to update the rectangle in which we draw the arc later on in paintEvent(). The arc's dimensions are chosen in such a way that the arc sits right on the edge of the dial. Because the arc is essentially a line with a border of arcWidth_ / 2 to its left and right, we offset the position of the arc by arcWidth_ / 2 so that it fits onto the screen perfectly.

CustomDial::updateValue() is the private slot we connected to QDial::valueChanged so we can monitor the value of the dial and update our internal variables. In it, we calculate the ratio between the dial's current value and the maximum value (e.g. 50 / 100 = 0.5) and then calculate the current angleSpan of the arc as that ratio multiplied by the maximum angle span (e.g. 0.5 * -360° = -180°).
We also store the dial value as a string so we can display it later on.

CustomDial::resizeEvent() is the method we inherited from QDial, that is called whenever the widget is forced to resize. In it, we resize and update all our internally stored QRects (for the arc, for the dial value and the dial label / title / text). I should mention that the dial text / label occupies the top half of the dial and the dial value string the bottom half.

Lastly, the most important method: CustomDial::paintEvent(). It does the actual work -- the actual painting of our widget. I added some comments to the first part, the rest should be quite easy to understand. Basically, we first make the background color ("background" property in CSS) retrievable by setting the background mode to Qt::OpaqueMode, then set the QPainter object's current brush to that used for the background (which includes the background color). After ensuring that we get nicely drawn, anti-aliased circles via QPainter::setRenderHint(QPainter::Antialiasing), we store the current pen (which holds the color from the "color" CSS property), then set the pen to a borderless one and finally draw our background circle. We then reset the current pen to the stored one and so that we can draw the dial label and dial value string with the appropriate color. Lastly, we use the stored arcPen_ to draw the arc around the dial. You already saw the definition of QPainter::drawArc() above.

And that should make your CustomDial work! Of course, as promised, you can customize the dial using stylesheets. This is the CSS for the dial I showed at the top of this post:

CustomDial {
  background-color: transparent;
  font-size: 18px;
  font-family: DIN;
  color: #27272B;
  qproperty-arcColor: #27272B;
  qproperty-arcWidth: 3; }

Thanks for reading! I hope this helped! :)

Sunday, February 15, 2015

Customizing QDials in Qt - Part 1

I am currently working on the Qt GUI for my C++ FM Synthesizer, Anthem, and wanted to share a particularly fun and interesting bit of that process in this post, namely how to customize the QDial class in Qt. While Qt generally provides a myriad of styling and customization options for all of its widgets, its developers seem to have forgotten about QDial. Out of the box, your only styling option for QDial is to keep it exactly how it is. But is that going to stop us from creating super sassy dials for our GUI projects? No!

I will show you how to create these two types of dials with fully customizable colors:


This tutorial will provide a general introduction and explain the implementation of the first dial. Part two will deal with the second dial shown.

When Qt draws a widget on the screen, it calls the widget's paintEvent() method, which then proceeds to paint the necessary rectangles, ellipses, lines and other elements and fills them with colors, shades and gradients to provide for a visual representation of the actions the widget is supposed to perform. For example, in Qt's implementation, QDial::paintEvent(QPaintEvent* pe) looks like so:

void QDial::paintEvent(QPaintEvent *)
{
    QStylePainter p(this);
    QStyleOptionSlider option;
    initStyleOption(&option);
    p.drawComplexControl(QStyle::CC_Dial, option);
}

The QPaintEvent object provides information about the region the widget is supposed to be drawn in, but this argument is usually ignored, as the rendered Widget normally fills the whole area available to it and not just a specific region. If you then spend 15 minutes following up the call chain to look for the piece of source code in Qt's repository that actually implements the drawing of QDial, just so that you can show it off in your tutorial, you'll find that this is how Qt draws its QDial (found here):

if (const QStyleOptionSlider *dial = qstyleoption_cast(opt)) {
            // OK, this is more a port of things over
            p->save();

            // avoid dithering
            if (p->paintEngine()->hasFeature(QPaintEngine::Antialiasing))
                p->setRenderHint(QPainter::Antialiasing);

            int width = dial->rect.width();
            int height = dial->rect.height();
            qreal r = qMin(width, height) / 2.0;
            qreal d_ = r / 6.0;
            qreal dx = dial->rect.x() + d_ + (width - 2 * r) / 2.0 + 1;
            qreal dy = dial->rect.y() + d_ + (height - 2 * r) / 2.0 + 1;
            QRect br = QRect(int(dx), int(dy), int(r * 2 - 2 * d_ - 2), int(r * 2 - 2 * d_ - 2));

            QPalette pal = opt->palette;
            // draw notches
            if (dial->subControls & QStyle::SC_DialTickmarks) {
                p->setPen(pal.foreground().color());
                p->drawLines(calcLines(dial, widget));
            }

            if (dial->state & State_Enabled) {
                p->setBrush(pal.brush(QPalette::ColorRole(styleHint(SH_Dial_BackgroundRole,
                                                                    dial, widget))));
                p->setPen(Qt::NoPen);
                p->drawEllipse(br);
                p->setBrush(Qt::NoBrush);
            }
            p->setPen(QPen(pal.dark().color()));
            p->drawArc(br, 60 * 16, 180 * 16);
            p->setPen(QPen(pal.light().color()));
            p->drawArc(br, 240 * 16, 180 * 16);

            qreal a;
            QPolygonF arrow(calcArrow(dial, a));

            p->setPen(Qt::NoPen);
            p->setBrush(pal.button());
            p->drawPolygon(arrow);

            a = angle(QPointF(width / 2, height / 2), arrow[0]);
            p->setBrush(Qt::NoBrush);

            if (a <= 0 || a > 200) {
                p->setPen(pal.light().color());
                p->drawLine(arrow[2], arrow[0]);
                p->drawLine(arrow[1], arrow[2]);
                p->setPen(pal.dark().color());
                p->drawLine(arrow[0], arrow[1]);
            } else if (a > 0 && a < 45) {
                p->setPen(pal.light().color());
                p->drawLine(arrow[2], arrow[0]);
                p->setPen(pal.dark().color());
                p->drawLine(arrow[1], arrow[2]);
                p->drawLine(arrow[0], arrow[1]);
            } else if (a >= 45 && a < 135) {
                p->setPen(pal.dark().color());
                p->drawLine(arrow[2], arrow[0]);
                p->drawLine(arrow[1], arrow[2]);
                p->setPen(pal.light().color());
                p->drawLine(arrow[0], arrow[1]);
            } else if (a >= 135 && a < 200) {
                p->setPen(pal.dark().color());
                p->drawLine(arrow[2], arrow[0]);
                p->setPen(pal.light().color());
                p->drawLine(arrow[0], arrow[1]);
                p->drawLine(arrow[1], arrow[2]);
            }

            // draw focus rect around the dial
            QStyleOptionFocusRect fropt;
            fropt.rect = dial->rect;
            fropt.state = dial->state;
            fropt.palette = dial->palette;
            if (fropt.state & QStyle::State_HasFocus) {
                br.adjust(0, 0, 2, 2);
                if (dial->subControls & SC_DialTickmarks) {
                    int r = qMin(width, height) / 2;
                    br.translate(-r / 6, - r / 6);
                    br.setWidth(br.width() + r / 3);
                    br.setHeight(br.height() + r / 3);
                }
                fropt.rect = br.adjusted(-2, -2, 2, 2);
                drawPrimitive(QStyle::PE_FrameFocusRect, &fropt, p, widget);
            }
            p->restore();
        }

Why am I showing you this? Because to customize a QDial, we have to re-paint it from scratch. Which is quite fun (and not so complicated as it looks here)! In general, when Qt provides no simple or intuitive way to style a QDial from a stylesheet or when its default rendering is an ... erm, "unpleasant sight", it is best to do a low-level re-paint of the widget.

For our first dial type, we want a static background circle as a surface for a movable, smaller circle that acts as the actual "knob" of the dial. The smaller circle (knob) will rotate around the edge of the background circle (dial). The angle at which the smaller circle is drawn relative to the center of the background circle will depend on the value of the dial. Just like the developers of the original QDial class, we also don't want our knob to go from 0 to 360 degrees, which would be visually unintuitive to the user (is it at 0 or 360 degrees?), but move within some other range. To keep things simple, we'll just use 90 degrees less for the total range. Moreover, we want the knob not to go from 0 degrees to 270 (center right to bottom), but rather from 225 degrees to -45 (or 315, but in this case we're going backwards). What you can take from all of this is that we'll have to do some trigonometry. Yey! Lastly, some words on styling. I love Qt's CSS (or QSS) feature, so we'll want full integration and support for styling from stylesheets for the dial's color and the knob's color, margin and size.

Our first step on the road to custom dials is subclassing the QDial class:

#ifndef CUSTOMDIAL_HPP
#define CUSTOMDIAL_HPP

#include <QDial>

class CustomDial : public QDial
{
    Q_OBJECT

    Q_PROPERTY(double knobRadius READ getKnobRadius WRITE setKnobRadius)

    Q_PROPERTY(double knobMargin READ getKnobMargin WRITE setKnobMargin)

public:

    CustomDial(QWidget * parent = nullptr,
               double knobRadius = 5,
               double knobMargin = 5);

    void setKnobRadius(double radius);

    double getKnobRadius() const;

    void setKnobMargin(double margin);

    double getKnobMargin() const;

private:

    virtual void paintEvent(QPaintEvent*) override;

    double knobRadius_;

    double knobMargin_;
};

#endif // CUSTOMDIAL_HPP

Besides the paintEvent() method to re-draw our widget, we also have knob radius and margin variables and appropriate accessors. Moreover, notice the Q_PROPERTY definitions, which will let us access these variables from a stylesheet.

This is the full definition of the CustomDial class and specifically of CustomDial::paintEvent():

#include "CustomDial.hpp"

#include <QPainter>
#include <QColor>

#include <cmath>

CustomDial::CustomDial(QWidget* parent,
                       double knobRadius,
                       double knobMargin)
: QDial(parent),
  knobRadius_(knobRadius),
  knobMargin_(knobMargin)
{
    // Default range
    QDial::setRange(0,100);
}

void CustomDial::setKnobRadius(double radius)
{
    knobRadius_ = radius;
}

double CustomDial::getKnobRadius() const
{
    return knobRadius_;
}

void CustomDial::setKnobMargin(double margin)
{
    knobMargin_ = margin;
}

double CustomDial::getKnobMargin() const
{
    return knobMargin_;
}

void CustomDial::paintEvent(QPaintEvent*)
{
    static const double degree270 = 1.5 * M_PI;

    static const double degree225 = 1.25 * M_PI;

    QPainter painter(this);

    // So that we can use the background color
    painter.setBackgroundMode(Qt::OpaqueMode);

    // Smooth out the circle
    painter.setRenderHint(QPainter::Antialiasing);

    // Use background color
    painter.setBrush(painter.background());

    // Store color from stylesheet, pen will be overriden
    QColor pointColor(painter.pen().color());

    // No border
    painter.setPen(QPen(Qt::NoPen));

    // Draw first circle
    painter.drawEllipse(0, 0, QDial::height(), QDial::height());

    // Reset color to pointColor from stylesheet
    painter.setBrush(QBrush(pointColor));

    // Get ratio between current value and maximum to calculate angle
    double ratio = static_cast(QDial::value()) / QDial::maximum();

    // The maximum amount of degrees is 270, offset by 225
    double angle = ratio * degree270 - degree225;

    // Radius of background circle
    double r = QDial::height() / 2.0;

    // Add r to have (0,0) in center of dial
    double y = sin(angle) * (r - knobRadius_ - knobMargin_) + r;

    double x = cos(angle) * (r - knobRadius_ - knobMargin_) + r;

    // Draw the ellipse
    painter.drawEllipse(QPointF(x,y),knobRadius_, knobRadius_);
}

The constructor just passes the QWidget parent pointer to QDial's constructor and also sets a default range of [0, 100] for the dial. Of course, all public and protected methods of QDial are also accessible from CustomDial, so we can reset this range outside of the constructor if we need to later on.

Now to paintEvent().

To position our knob on the dial, we'll need some trigonometry, which, when used with circles, usually involves Pi, so we'll want to have some of that in our code somewhere. Because Pi is not destined to change in the foreseeable future,  we can have two const doubles that we scale appropriately for the angles we need (1.5 * pi = 270 degrees; 1.25 * pi = 225 degrees) and which we also make static, so that they are initialized only once for this function.

Next, we need a QPainter object that will do the actual painting and rendering for us. Its constructor's only argument is the QPaintDevice that it it supposed to draw on, in this case "this" -- our dial widget. Also, we set the render hint QPainter::Antialising, to get smooth circles, using painter.setRenderHint().

In order to use the background color from a stylesheet (set either by "background: ...;" or "background-color: ...;" in CSS), we need to set our CustomDial class' background mode to Qt::OpaqueMode. This will activate the background color for the painter object and we can safely retrieve the color that was set in the stylesheet with painter.background(), which returns a QBrush object (for filling). If we needed the QColor object with the background color itself, we could get it with painter.background().color(). However, given that the next step is to set the brush for the background circle we're about to draw, we can just use the brush object itself and set it as the painter's current brush by passing it to painter.setBrush(). By default, the painter will also draw a border around the circle. No thanks. The border and its color is determined by the painter's current QPen object, so to disable the border entirely, we just call painter.setPen(QPen(Qt::NoPen)), which will set the painter's pen to an invisible one. However, before we get rid of the pen, we need to retrieve its color, as this is the other property that can be set using stylesheets ("color" property in CSS) and which we need for the knob color. So, first store the pen's color, then get rid of the pen.

Next up, we can finally draw our first circle. The painter's method for this is unfortunately not drawCircle(), but drawEllipse(), which means we have to pass the same diameter twice to get a circle. I hope you will survive the extra effort. drawEllipse() takes the x and y coordinates to start the drawing for, and then a width and height to determine the size of the ellipse. We draw the ellipse starting in the top left corner (0, 0) and get its diameter from the height of the CustomDial widget. This means that you can (and have to) set the size of the dial using CustomDial::setFixedSize() or any other resizing method.

Once we have the background circle drawn, we can move on to the smaller knob circle. First, we reset the brush of the painter so that it uses the color we retrieved from the stylesheet earlier. Then, it is time to math (I know that's not a verb). So, we calculate the ratio between the current dial value and its maximum, and from that ratio then determine the angle at which we'll draw the knob. Remember, the maximum angle is 270 degrees, and we offset it by -225 degrees to get our preferred range of angles. Knowing that in a circle, the sine of an angle is equal to the opposite side (our y coordinate) divided by the hypothenuse (or radius), and the cosine of that angle to the adjacent side (our x coordinate) divided by the radius, we can reform these equations to get our x and y coordinates. Note the two offsets. The first, (r - knobRadius_ - knobMargin_), essentially makes the available background circle space for the knob smaller, so that it won't stick to the dial's edges. The second offset, + r, ensures that position (0, 0) is in the center of the background circle and not in the top left corner.

Finally, we draw our knob circle by calling painter.drawEllipse() again, this time the overload that has a center QPointF with our x and y coordinates as its first argument and then two radii as its second and third argument. These radii are both the same for a circle.

To customize the look of our dial, we can use CSS / QSS stylesheets, as promised:

CustomDial
{
    background-color: #27272B;
    color: #FFFFFF;
    qproperty-knobRadius: 5;
    qproperty-knobMargin: 5;
}

These properties are also accessible via CustomDial::setStylesheet(), of course:

CustomDial* dial = new CustomDial(this);

dial->setStyleSheet("background-color: #27272B; color: #FFFFFF;");
dial->setStyleSheet("qproperty-knobMargin: 5; qproperty-knobMargin: 5;");

And that'll be it for this part of the tutorial! I hope you learned something and will be back for the second part.